Make a Homemade Planter Box For Under $30
When you live in a second floor walk-up there are certain things you sacrifice. When we moved in I realized that there was no way I would be able to seed the cement back patio and have a luscious patch of green to call my own. I have accepted this and moved on. Presently I tell myself that at least this way there is no lawn that needs to be mowed. I have come to terms with not having grass to roll around in and I am alright with it. For now.
One thing that I wasn't willing to sacrifice, regardless of our second floor status, was a garden. A few months ago John and I made several shopping trips. I had it in my head that I was going to buy some long, and narrow in proportion planter boxes to line our patio. Did I want square ones? No. Did I want small little rectangles that looked like elongated loaf pans to grow plants in? No. I wanted substantial 18 inch wide, 6 foot long planter boxes.
We went to 4 or 5 different stores ranging from one stop shops, to hardware stores, we even peeked around Wal-Mart. What can I say, I was excited by the prospect of growing veggies and fruits and didn't care where I got their receptacles, as long as they were what I wanted. Turns out no stores had exactly what I wanted. Then we went to Jerry's.
Walking down the last isle of the garden section I was bemoaning the fact that no one had what I wanted, that I didn't care how much it cost, if only we could find the right thing. Patiently pushing the cart behind me and listening to me moan and throw my hands in the air like a child, John stops me and points down to some cedar boxes under a low lying rack. They were as near perfect as any of the boxes I'd seen. They weren't my full 18 inches wide, more like 10. And they were a mere 3.5 feet long. But dammit, they were wood and they were at least similar to the length-width ratio I wanted. Excited at finally finding something similar to what I wanted I drug two out and examined them end to end. I could definitely picture them on the patio. And since I had put the cart a little before the horse and already purchased +25 plants of varying varieties, I decided we were buying three. Then I looked at the price tag.
They were expensive. $85. Each. And they weren't even exactly what I wanted. So much for being willing to pay anything. This is where John comes to the rescue and suggests we build our own. We both got on our phones and looked for plans for above ground planter boxes with attached bottoms and came up empty handed. We meandered through the lumber section and found some wood we believed would work. The rest is history.
We created our own plan for boxes. We have now built 3 boxes with a combined price of less than $65 between the three of them. They measure 17.5" x 6' and are nearly perfect. They house the plants I bought before I had found my dream boxes and then some. If you live in an apartment and have the space to do so I highly recommend growing your own veggies. We haven't turned a crop yet (minus the leaves we pull off the lettuce heads as we need them) but I did find my first little green tomato hiding within one of the tomato plants a few mornings ago. I am elated every morning when I find new blooms on the tomatoes, or maturing leaves on the broccoli sprouts.

How to make your own planter box:
Materials:
- Drill
- 84 - 7/8" screws, though 3/4" will work as well. We bought a pack of 100 screws for $3.50
- A saw to cut boards into desired lengths. If you don't have access to a saw the lumbar department at most hardware stores will cut the boards for you either for free or for a small fee.
-Lumber:
- We used 1/2" thick 5.5"x 72" cedar fence boards. These cost us $1.17 per board. To make one planter box you will need 18 boards. (We bought 20 boards per box just to be safe) The measurements are as follows:
- 7 full length uncut boards
- 4 boards - 17.5"x 5.5"
- 8 boards - 11"x 5.5"
- 1 board - 16.5"x 2"
Note: All boards above are 1/2" thick, as previously stated
Step 1: Lay three of the uncut full length boards next to each other. Make sure that both ends of all three boards are flush. Take two of the 11" long boards and place them over the three longer boards. Screw the 11" boards into the longer boards using 8 screws, as seen in the image below. This is the floor of your planter box!

Step 2: After assembling the floor assemble the sides in a similar fashion, though instead of using three uncut boards use two. Lay the two boards side by side, ensuring that the ends are flush. Place three of the 11" long boards along the two uncut boards. Centering these boards gives the sides a more attractive look in my opinion, though the major functionality of the sides is structure and stability so centering them is optional. I used four screws to attach each of the outlying 11" boards and then eight screws to attach the middle 11" board, as seen in the photos below. You will need to do step 2 twice to make both of the planter box's sides.


Step 3: After creating the floor and the sides you need to attach them to one another! It is helpful to have a second person around to do this. To attach a side to the bottom lay the bottom of the box on the ground and align the side at a right angle to the bottom, with the support boards facing out. I placed a screw on either side of each 11" board and one on each end, as shown below. Repeat this process for the other side of the box. Don't be concerned if the sides seem a little wobbly. As soon as the support beam is placed across the sides will feel very solid.
Step 4: After attaching both sides to the bottom, the 16.5"x 2" board should be wedged in between the two sides and drilled into place. This will help to stabilize the sides.

Step 5: The only boards left should be the four 17.5" long boards. These are going to become the ends of our planter box. Place one board flush with the end of the planter box and screw it in place to create a completed end, then place another board on top and screw it in place as shown in the image below. Repeat this step for the other end and you have a completed planter box! I used four screws to attach each board.

It took a little over two and a half 1.5 cu. ft. bags of potting soil to fill each of these boxes, and that left us with about a 5 inch lip from the soil line to the edge. The boxes are holding up well and I cannot wait for the first veggie I harvest from our homemade above ground garden!

One thing that I wasn't willing to sacrifice, regardless of our second floor status, was a garden. A few months ago John and I made several shopping trips. I had it in my head that I was going to buy some long, and narrow in proportion planter boxes to line our patio. Did I want square ones? No. Did I want small little rectangles that looked like elongated loaf pans to grow plants in? No. I wanted substantial 18 inch wide, 6 foot long planter boxes.
We went to 4 or 5 different stores ranging from one stop shops, to hardware stores, we even peeked around Wal-Mart. What can I say, I was excited by the prospect of growing veggies and fruits and didn't care where I got their receptacles, as long as they were what I wanted. Turns out no stores had exactly what I wanted. Then we went to Jerry's.
Walking down the last isle of the garden section I was bemoaning the fact that no one had what I wanted, that I didn't care how much it cost, if only we could find the right thing. Patiently pushing the cart behind me and listening to me moan and throw my hands in the air like a child, John stops me and points down to some cedar boxes under a low lying rack. They were as near perfect as any of the boxes I'd seen. They weren't my full 18 inches wide, more like 10. And they were a mere 3.5 feet long. But dammit, they were wood and they were at least similar to the length-width ratio I wanted. Excited at finally finding something similar to what I wanted I drug two out and examined them end to end. I could definitely picture them on the patio. And since I had put the cart a little before the horse and already purchased +25 plants of varying varieties, I decided we were buying three. Then I looked at the price tag.
They were expensive. $85. Each. And they weren't even exactly what I wanted. So much for being willing to pay anything. This is where John comes to the rescue and suggests we build our own. We both got on our phones and looked for plans for above ground planter boxes with attached bottoms and came up empty handed. We meandered through the lumber section and found some wood we believed would work. The rest is history.
We created our own plan for boxes. We have now built 3 boxes with a combined price of less than $65 between the three of them. They measure 17.5" x 6' and are nearly perfect. They house the plants I bought before I had found my dream boxes and then some. If you live in an apartment and have the space to do so I highly recommend growing your own veggies. We haven't turned a crop yet (minus the leaves we pull off the lettuce heads as we need them) but I did find my first little green tomato hiding within one of the tomato plants a few mornings ago. I am elated every morning when I find new blooms on the tomatoes, or maturing leaves on the broccoli sprouts.

The first tomato!!!
How to make your own planter box:
Materials:
- Drill
- 84 - 7/8" screws, though 3/4" will work as well. We bought a pack of 100 screws for $3.50
- A saw to cut boards into desired lengths. If you don't have access to a saw the lumbar department at most hardware stores will cut the boards for you either for free or for a small fee.
-Lumber:
- We used 1/2" thick 5.5"x 72" cedar fence boards. These cost us $1.17 per board. To make one planter box you will need 18 boards. (We bought 20 boards per box just to be safe) The measurements are as follows:
- 7 full length uncut boards
- 4 boards - 17.5"x 5.5"
- 8 boards - 11"x 5.5"
- 1 board - 16.5"x 2"
Note: All boards above are 1/2" thick, as previously stated

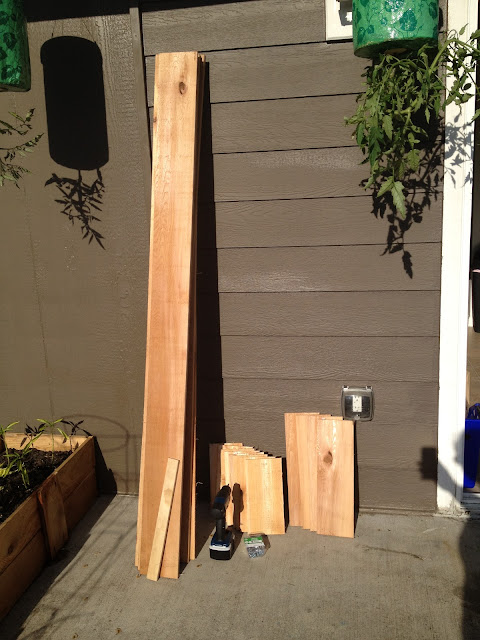
Materials!
Step 1: Lay three of the uncut full length boards next to each other. Make sure that both ends of all three boards are flush. Take two of the 11" long boards and place them over the three longer boards. Screw the 11" boards into the longer boards using 8 screws, as seen in the image below. This is the floor of your planter box!

The floor


Step 3: After creating the floor and the sides you need to attach them to one another! It is helpful to have a second person around to do this. To attach a side to the bottom lay the bottom of the box on the ground and align the side at a right angle to the bottom, with the support boards facing out. I placed a screw on either side of each 11" board and one on each end, as shown below. Repeat this process for the other side of the box. Don't be concerned if the sides seem a little wobbly. As soon as the support beam is placed across the sides will feel very solid.
 |
| The first side attached |

Support beam in place
Step 5: The only boards left should be the four 17.5" long boards. These are going to become the ends of our planter box. Place one board flush with the end of the planter box and screw it in place to create a completed end, then place another board on top and screw it in place as shown in the image below. Repeat this step for the other end and you have a completed planter box! I used four screws to attach each board.

Completed planter box!
It took a little over two and a half 1.5 cu. ft. bags of potting soil to fill each of these boxes, and that left us with about a 5 inch lip from the soil line to the edge. The boxes are holding up well and I cannot wait for the first veggie I harvest from our homemade above ground garden!


Love this tutorial!!! We have searching for a long wooden planter box for indoor decorating. This is perfect!
ReplyDeleteI'm glad you like it! Ours are currently empty after harvesting tomatoes, cucumbers, broccoli, basil, bell peppers and salad greens.
ReplyDeleteWhat do you plan on planting in yours?
Thanks I will be building these planters this weekend ! thanks so much!!
ReplyDeleteI was trying to find a cheap way to make a large planter for my girlfriends new deck and I was having the hardest time keeping the lumber costs down. The fence post idea was genius! I made it today and spent just over $20. Thanks so much!
ReplyDeleteHello!
ReplyDeleteThis looks like a really great project that my husband and I MAY actually be able to do. I just have some questions:
1. Did you have line the bottom of the planters with anything?
2. Did you drill drainage holes on the bottom?
3. How are they holding up after a year?
Thanks so much for sharing your project plans. Looking forward to your reply.
Hello!
ReplyDeleteShort answers are: no, no and good!
We never thought to line them, but I'm sure if you did that would some kind of plant friendly material I wouldn't be a bad thing.
And we didn't drill any drain holes because the fence boards shrink and swell quite abit so it hasn't been necessary.
Thanks for reading and good luck with the building!
Quick question: when I do the math, I only need 10 boards.... am I wrong? 7 full length, 1 board will get the 4-17.5", 2 boards will get the 8-11" pieces, and with the 56" scrap from that 2nd board, I can get the 1-16.5" and still have 39.5" left over...? Why 18? HELP!!
ReplyDeleteI cannot believe I didn't notice this! When I was writing this tutorial I made 2 planter boxes, though of course, only did measurements and pictures for one! You are completely correct! You only need 10 boards to complete this project. We bought 20 boards and made 2 boxes. Thank you for pointing this out!!!
DeleteI cannot believe I didn't notice this! When I was writing this tutorial I made 2 planter boxes, though of course, only did measurements and pictures for one! You are completely correct! You only need 10 boards to complete this project. We bought 20 boards and made 2 boxes. Thank you for pointing this out!!!
ReplyDelete