What to do with Pumpkin Guts: How to Dry Pumpkin Seeds, How to Roast Pumpkin Seeds, & Create a Compost Feast
I have an announcement!!! The leaves are FINALLY turning yellow. Hooray!!!
Fall is my favorite time of year, its just warm enough that I can still get away with wearing flip flops, but just cool enough I can also manage to wear a scarf without getting strange looks. Probably an interesting image created right there, a flip-flop wearing, scarf sporting fashion faux pas. That would most definitely get weird looks. And although I don't wear the aforementioned clothing articles at the same time, you get the picture. My favorite thing about Fall: VARIETY
Yesterday afternoon was not a flip-flop day. It was a rubber boots and raincoats day. Ten miles from our home is Lone Pine Farms, which is in my humble opinion, an autumn paradise. They have hayrides, corn mazes, and of course, PUMPKINS.
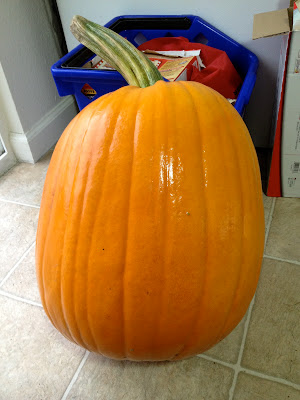
My Perfect Pumpkin
Everyone loves to carve pumpkins, and for those with kids, you have someone to gut them. We on the other hand are kid-less. Meaning I got to gut those Orange beauties.
 |
| Gutting my perfect pumpkin |
But what is one to do with all of those guts after your pumpkin is empty? I personally think it would be fun to give someone an "unwilling pumpkin facial". But, in lieu of hitting anyone in the face with pumpkin guts, this spooky season, I opted for an alternative. We dried some of our seeds, and then we roasted the rest, recipes to follow.
How to Dry Pumpkin Seeds
You may be wondering why a person would dry pumpkin seeds. The answer is simple: TO GROW PUMPKINS!!!
Next spring, pumpkin seeds will be one less thing on my "to purchase list", as we have harvested our own and now have more than enough seeds to grow pumpkins for the whole neighborhood, in our trusty homemade planter boxes. If you haven't read our entry on how to make a homemade planter box, you can find that here. The process to dry seeds for your own planting use is really quite simple:
1) Gather your pumpkin guts in a large bowl.
2) Separate the seeds from the rest of your pumpkin guts.
 |
| Freshly separated pumpkin seeds |
3) As you can see after separating the seeds there is still some orange residue remaining. Put your seeds in a colander and rinse under cool water, the orange pieces will float to the top, where you can remove them from your seeds.
4) Once you have throughly rinsed your seeds pat them dry with a paper towel and lay them out in a one seed thick layer on a paper towel covered cookie sheet or mesh drying rack. That's it! Leave them in a cool, dry place for 3-4 weeks to ensure they are fully dried, then seal in an air tight bag or container until you are ready to plant them! Watch out next spring/summer for a follow up blog where we germinate our seeds!
How to Roast Pumpkin Seeds
If you have never had roasted pumpkin seeds, go down to your local farm, store, etc. and get yourself a pumpkin; You have been missing out. To complete this recipe you will need to complete steps 1-3 in the tutorial featured above, which will leave you with nice clean pumpkin seeds, ready to be roasted.
Ingredients:
1 C. fresh, whole pumpkin seed
1/4 C. butter
Salt to taste
1) Preheat oven to 350 degrees.
2) Melt butter and stir into pumpkin seeds.
3) Spread seeds out on baking sheet. Add salt to taste. At this point you can also add many other kinds of seasoning, including garlic salt, cajun seasoning, or even cinnamon & sugar!
 |
| Seeds in the oven! |
4) Bake seeds for 30-35 or until golden brown.
5) Store in a sealed container for up to a week! Enjoy!
Compost Feast!
All of the extra guts and pieces from the pumpkin can be added to your compost pile or worm bin to help create nutrient rich compost for your garden and to cut down on waste! When you are done enjoying your jack'o lantern, the pumpkin itself can go into the compost pile! If you're interested in starting your own worm bin, click here!
Happy Halloween, and Happy Pumpkin Gutting!


Comments
Post a Comment